Sweet Taro Buns Recipe
Download Quick Guide & Sweet Taro Buns Recipe (Din Tai Fung Dessert Style)
For a quick printable version of this recipe, download the A4 guide above.
It includes all ingredient measurements, step-by-step instructions, and expert-level reheating and freezing methods, making your Sweet Taro Buns Recipe easy to master.
The printable file is perfect for kitchen use or sharing with dessert enthusiasts.
For more professional tips, tricks, and explanations, scroll down for the full detailed version below.
For the Authentic history and knowledge of the dish, you can visit our page.
⏱ Quick Overview
| Category | Details |
|---|---|
| Prep Time | 1 hour 20 minutes |
| Cook Time | 12 minutes |
| Total Time | 1 hour 32 minutes |
| Difficulty Level | Intermediate |
| Servings | 6 people (about 12 buns) |
| Cuisine | Taiwanese / Chinese Dessert |
| Estimated Cost | $7–10 (approx.) |
💖 Introduction: A Love Letter to Sweet Taro Buns
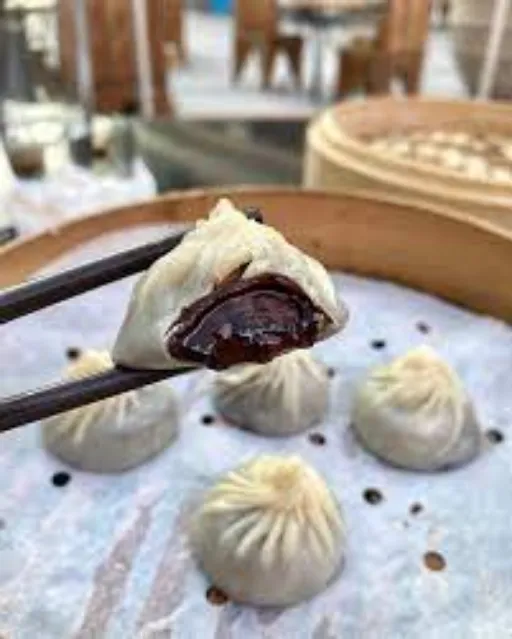
Step into the world of heavenly dessert buns with this Sweet Taro Buns Recipe, inspired by the iconic dessert buns of Din Tai Fung. Each bun is a soft, pillowy masterpiece that encapsulates a rich, velvety taro filling, slightly sweet with a hint of coconut cream, wrapped in perfectly steamed dough that melts in your mouth.
The enchanting aroma of steaming buns, the delicate texture of the dough, and the natural sweetness of taro combine to create a dessert that is both comforting and indulgent. Perfect for a festive gathering, afternoon tea, or a self-indulgent treat, this recipe elevates a simple root vegetable into a luxurious dessert.
Originating from traditional Chinese bakery practices but perfected in Taiwanese culinary artistry, this Sweet Taro Buns Recipe allows you to bring a piece of the sophisticated Din Tai Fung experience into your kitchen. With this guide, you’ll master soft, fluffy buns that are sweet, aromatic, and irresistibly tender.
🧂 Ingredients
For the Dough
| Ingredient | Quantity |
|---|---|
| All-purpose flour | 2 ½ cups (310g) |
| Instant yeast | 1 ½ tsp |
| Sugar | 3 tbsp |
| Warm milk | ¾ cup (180ml) |
| Unsalted butter | 2 tbsp, softened |
| Salt | ½ tsp |
| Egg | 1 large |
For the Taro Filling
| Ingredient | Quantity |
|---|---|
| Taro root (peeled & steamed) | 250g |
| Sugar | 4 tbsp (adjust to taste) |
| Coconut milk | 3 tbsp |
| Unsalted butter | 1 tbsp |
| Condensed milk | 1 tbsp (optional, for extra creaminess) |
| Vanilla extract | ½ tsp |
| Salt | A pinch |
For the Egg Wash (Optional for a Light Shine)
| Ingredient | Quantity |
|---|---|
| Egg yolk | 1 |
| Milk | 1 tsp |
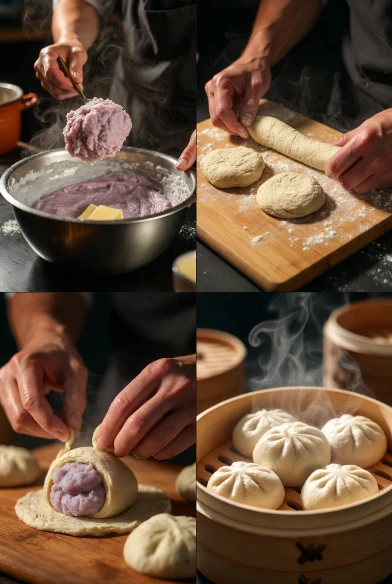

👩🍳 Step-by-Step Instructions
Creating the perfect taro filling is the soul of this recipe. You want it creamy, smooth, slightly sweet, and rich.
Prepare the Taro Filling
- Steam the peeled taro until completely soft (about 15–20 minutes).
- Mash the taro thoroughly with a fork or potato masher until smooth.
- Add sugar, coconut milk, unsalted butter, and condensed milk (if using).
- Stir over low heat until the mixture becomes creamy and slightly thickened.
- Add a pinch of salt and vanilla extract. Mix well.
- Let the filling cool completely before assembling (important for shaping the buns).
Chef’s Tip: The taro filling must be firm but smooth. If too soft, refrigerate for 10–15 minutes before using to prevent the buns from collapsing during steaming.
Make the Dough
- In a large mixing bowl, combine warm milk, sugar, and instant yeast. Let it sit for 5 minutes until foamy.
- Add the flour and salt. Mix until a rough dough forms.
- Knead in the softened butter and egg gradually, about 10–12 minutes until smooth, elastic, and slightly tacky.
- Place the dough in a greased bowl, cover with a damp cloth, and let it rise in a warm place for 1 hour, or until doubled in size.
Chef’s Tip: Kneading properly develops gluten, ensuring soft, fluffy buns. Avoid over-kneading, or buns can become chewy.
Shape the Sweet Taro Buns Recipe
- Once risen, punch down the dough and divide it into 12 equal portions (~40–45g each).
- Roll each portion into a ball, then flatten gently into a circle (about 3 inches wide).
- Place a spoonful of cooled taro filling in the center of the dough.
- Gather the edges and pinch together at the top, ensuring the filling is sealed completely.
- Place the buns seam-side down on parchment squares.
Chef’s Tip: Keep the dough and filling chilled for easier shaping. Lightly dust hands with flour to prevent sticking.
Second Proof
- Cover the shaped buns with a damp cloth.
- Let them rest and proof for another 20–25 minutes until slightly puffy.
Steam to Perfection
- Line a bamboo steamer with parchment paper or cabbage leaves.
- Place buns evenly, leaving space between each.
- Steam over boiling water for 12 minutes.
- Turn off the heat and leave buns covered for 2 minutes before opening the lid.
Chef’s Tip: Steam over high, rolling water for consistent heat. Avoid opening the lid during steaming to maintain delicate texture.
Optional Egg Wash
For a slightly shiny bun, brush lightly with the egg yolk mixture after steaming and serve immediately.
🍽️ Serving Suggestions and Tips
Serve your Sweet Taro Buns Recipe warm with a cup of jasmine tea or matcha latte. Pairing these soft, delicate buns with light tea balances the natural sweetness of taro and adds elegance to your dessert presentation.
For an Instagram-worthy presentation, place buns in a bamboo basket, sprinkle lightly with toasted sesame seeds, or add edible flowers around the tray.
Chef’s Tip: Buns are best served the same day, but they retain flavor beautifully when stored properly.
💰 Estimated Cost Breakdown
| Ingredient | Quantity | Approx. Cost (USD) |
|---|---|---|
| All-purpose flour | 2 ½ cups | $0.60 |
| Taro root | 250g | $3.00 |
| Coconut milk & butter | — | $2.50 |
| Sugar & condensed milk | — | $1.50 |
| Miscellaneous | — | $0.50 |
| Total Estimated Cost | — | $7–10 |
🔥 Storage & Reheating-Keep the Same Freshness as Day One
Homemade Xiao Long Bao can taste just as fresh and flavorful even days later — if you store and reheat them properly. Because this Chicken Xiao Long Bao Recipe includes broth gelatin inside, it needs a little extra care to maintain its delicate structure and signature juicy center. Here’s how you can make, store, and reheat it like a pro:
🧊 Freezing Tips (for Uncooked Dumplings)
- Freeze immediately after shaping on a tray without touching each other.
- Transfer to airtight containers or freezer bags after 2–3 hours.
- Label with the date – buns stay fresh up to 1 month.
- Avoid condensation and stacking directly.
🔁 Reheating Tips (for Best Taste & Texture)
- Steam directly from frozen for 14–15 minutes.
- Avoid microwaving to prevent soggy, tough buns.
- Brush lightly with coconut milk or butter after steaming for extra shine and softness.
🪄 Pro Tips to Keep the “Day-One” Flavor of Sweet Taro Buns Recipe
- Use fresh taro for naturally sweet flavor; canned or frozen taro can affect taste and texture.
- Chill the filling before assembly to prevent leaks.
- Always proof the dough in a warm, draft-free environment.
- For extra-soft buns, use low-gluten flour.
- Store steamed buns in an airtight container to maintain moisture.